segunda-feira, novembro 10, 2014

How To Backup, Restore, and Changing Your Android ID With Titanium Backup

change androidid (android id) for android 6 marshmallow 6.0 6.0.1


adb shell content delete --uri content://settings/secure --where "name=\'android_id\'"
adb shell content insert --uri content://settings/secure --bind name:s:android_id --bind value:s:YOUR_ID


adb shell content update --uri content://settings/secure --bind value:s: --where "name=\'android_id\'"


adb shell content query --uri content://settings/secure --where "name=\'android_id\'"


adb shell content query --uri content://settings/secure --where "name=\'android_id\'"
adb shell content delete --uri content://settings/secure --where "name=\'android_id\'"
adb shell content insert --uri content://settings/secure --bind name:s:android_id --bind value:s:YOUR_ID
adb shell content query --uri content://settings/secure --where "name=\'android_id\'"


Open titanium backup and confirm android id change 

How To Backup, Restore, and Changing Your Android ID With Titanium Backup

Android ID is a set of 16 hexadecimal number. Some applications or games use it as a identification ID for your account. As an example, all games from Gamevilwill save your Android ID in their game archives. When you try to hack one of their games, your Android ID will get banned. And you wouldn’t be able to play their game anymore from your Android device.

To be able to play Gamevil games again, you will need a new Android ID. As far as I know, Titanium Backup is the only application in the store that have the function to changing, backup, and restore your Android ID.
Changing your Android ID is a good way to experiment with some hacks before you use it in your game data. And it is the only solution when you get banned by Gamevil.
Now I will show you “How To Backup, Restore, and Changing Your Android ID With Titanium Backup”.
BACKUP
  • Run Titanium Backup
  • Click on “Backup/Restore” tab
  • Find “Setting Storage” from the list.
    Try to use the “Filters” if you have a long list of apps.
  • Click on “Setting Storage“, and choose “Backup !
  • After the Backup process, click again “Setting Storage” to open the “Backup properties
  • Click the title part of your new backup (area between the Restore and Deletebutton)
  • Scroll down untill you find “Protect this backup” and click it
  • Now your Android ID is protected and will not get overwritten when you make another backup of your newAndroid ID. So you can have multipleAndroid ID as much as you want
CHANGE
  • Run your Titanium Backup
  • Press the menu button, click on More, and choose Manage Android ID …
  • TB will show you a dialog window with your current Android ID as the title
  • To change your Android ID, click “Create new (random) Android ID”
  • TB will showing your new Android ID and asking your permission to reboot the device.
  • Click “Yes, do it” to change your current Android ID with the new one you see on the screen.
  • Your device will be rebooted and have a new Android ID
RESTORE
  • Run your Titanium Backup
  • Press the menu button, click on More, and choose Manage Android ID …
  • TB will show you a dialog window with your current Android ID as the title
  • Click on “Restore Android ID from a backup”
  • TB will show you a list of all Android ID you have.
  • Click on any Android ID you want
  • TB will showing your new Android ID and asking your permission to reboot the device.
  • Click “Yes, do it” to change your current Android ID with the new one you see on the screen.
  • Your device will be rebooted and after the reboot your Android ID will be restored.

Initial Settings after installing the CentOS 7

Initial Settings after installing the CentOS 7 | Lazy Geek -:)

Centos 7 initial setup

Initial Settings after installing the CentOS 7

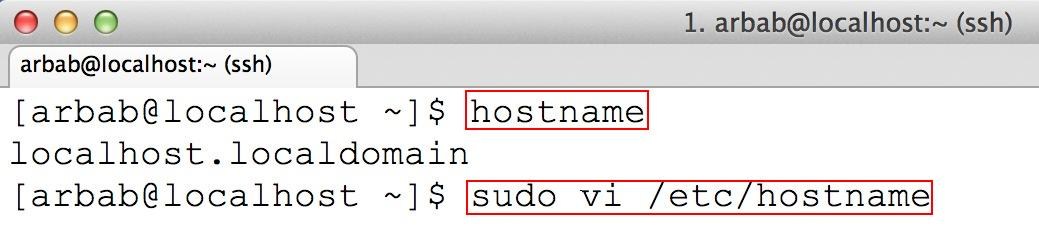
1) To change the hostname permanently, edit the following file:
sudo vi /etc/hostname
centos7
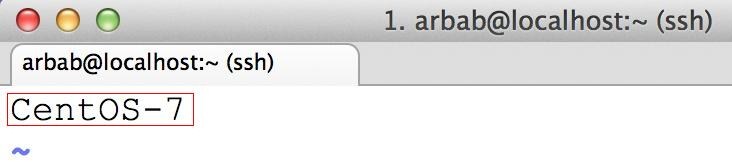
Here you can simply put the name of your system (in my case, I have assigned it CentOS-7):
centos7 (1)
After that, edit the hosts file:
sudo vi /etc/hosts
centos7 (2)
Here add the same name, that you have added in the /etc/hostname file, after 127.0.0.1:
centos7 (3)
After reboot, it will display the new hostname.
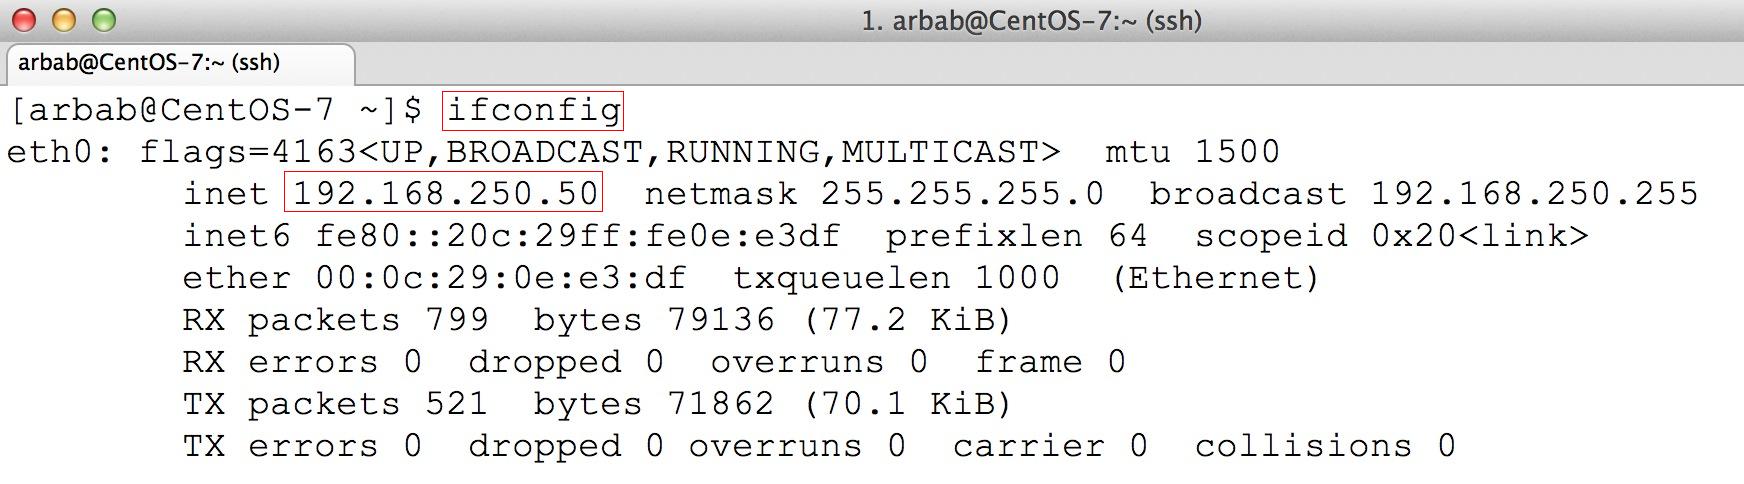
2) After login to the CentOS7 server(minimal installation), you will notice that the system doesn’t have ifconfig command :
centos7 (4)
Install the net-tools package which will include ifconfig:
sudo yum install net-tools
centos7 (5)
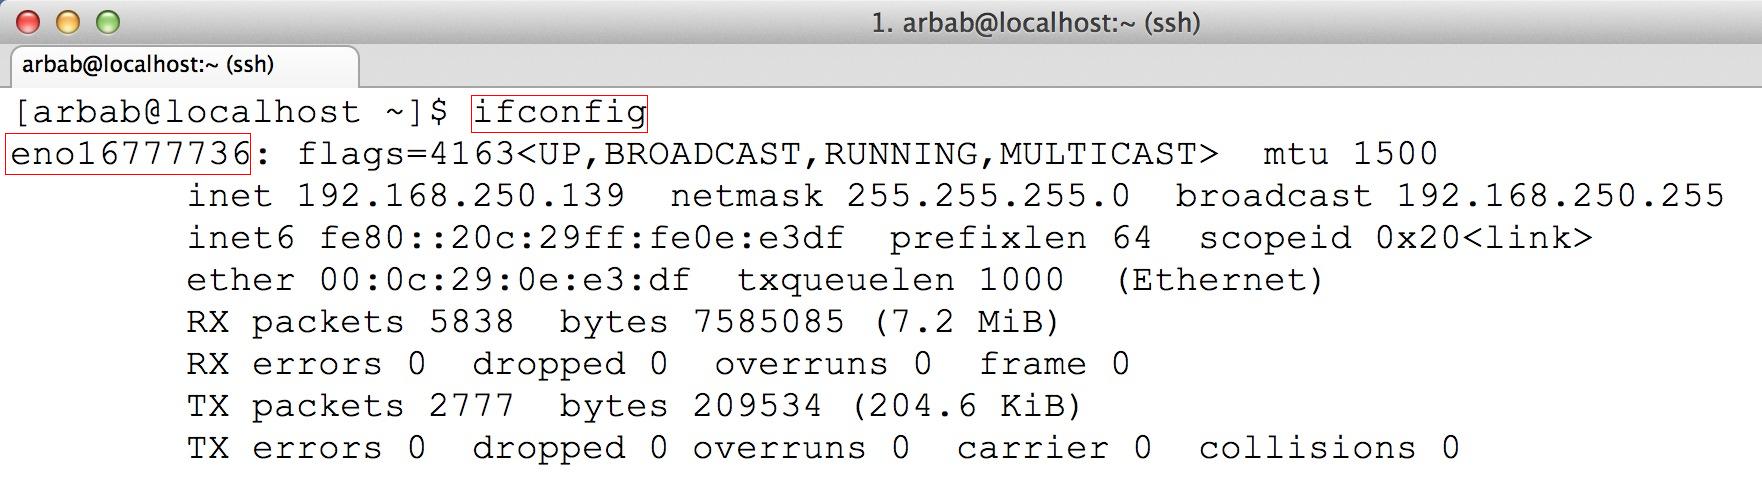
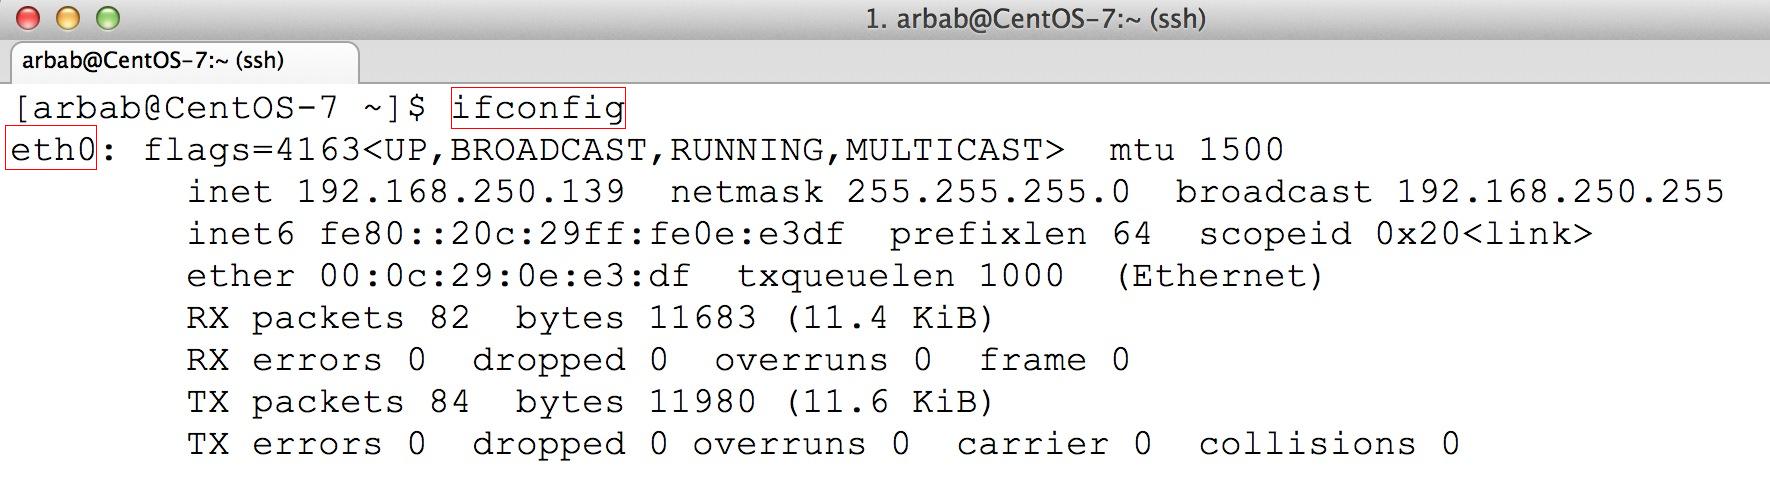
Try the ifconfig command once again:
centos7 (6)
3) Change the default network interface name to “eth0″
CentOS7 has a default nic name as “en016…..”, as we can see in above screenshoot. To change it back to the default network device name like “ethX”, edit the grub file:
sudo vi /etc/default/grub
centos7 (7)
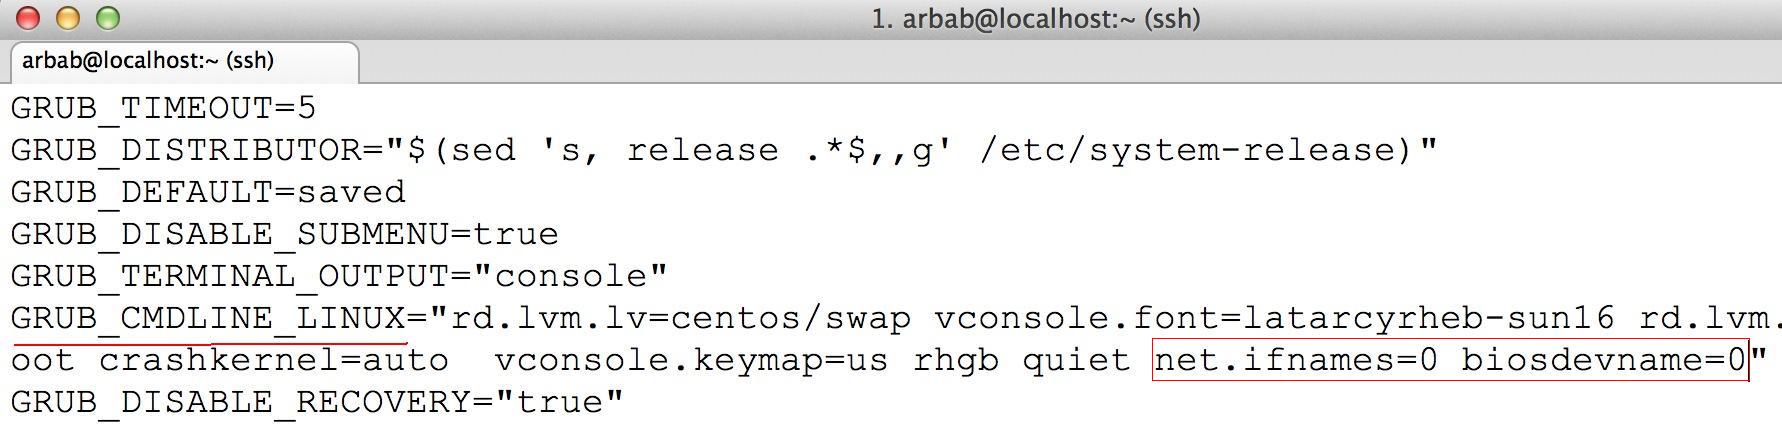
Search for the line “GRUB_CMDLINE_LINUX” and append the following: “net.ifnames=0 biosdevname=0
Will look like this:
GRUB_CMDLINE_LINUX="rd.lvm.lv=rootvg/usrlv rd.lvm.lv=rootvg/swaplv crashkernel=auto 
vconsole.keymap=usrd.lvm.lv=rootvg/rootlv vconsole.font=latarcyrheb-sun16 rhgb 
quiet net.ifnames=0 biosdevname=0"
centos7 (8)
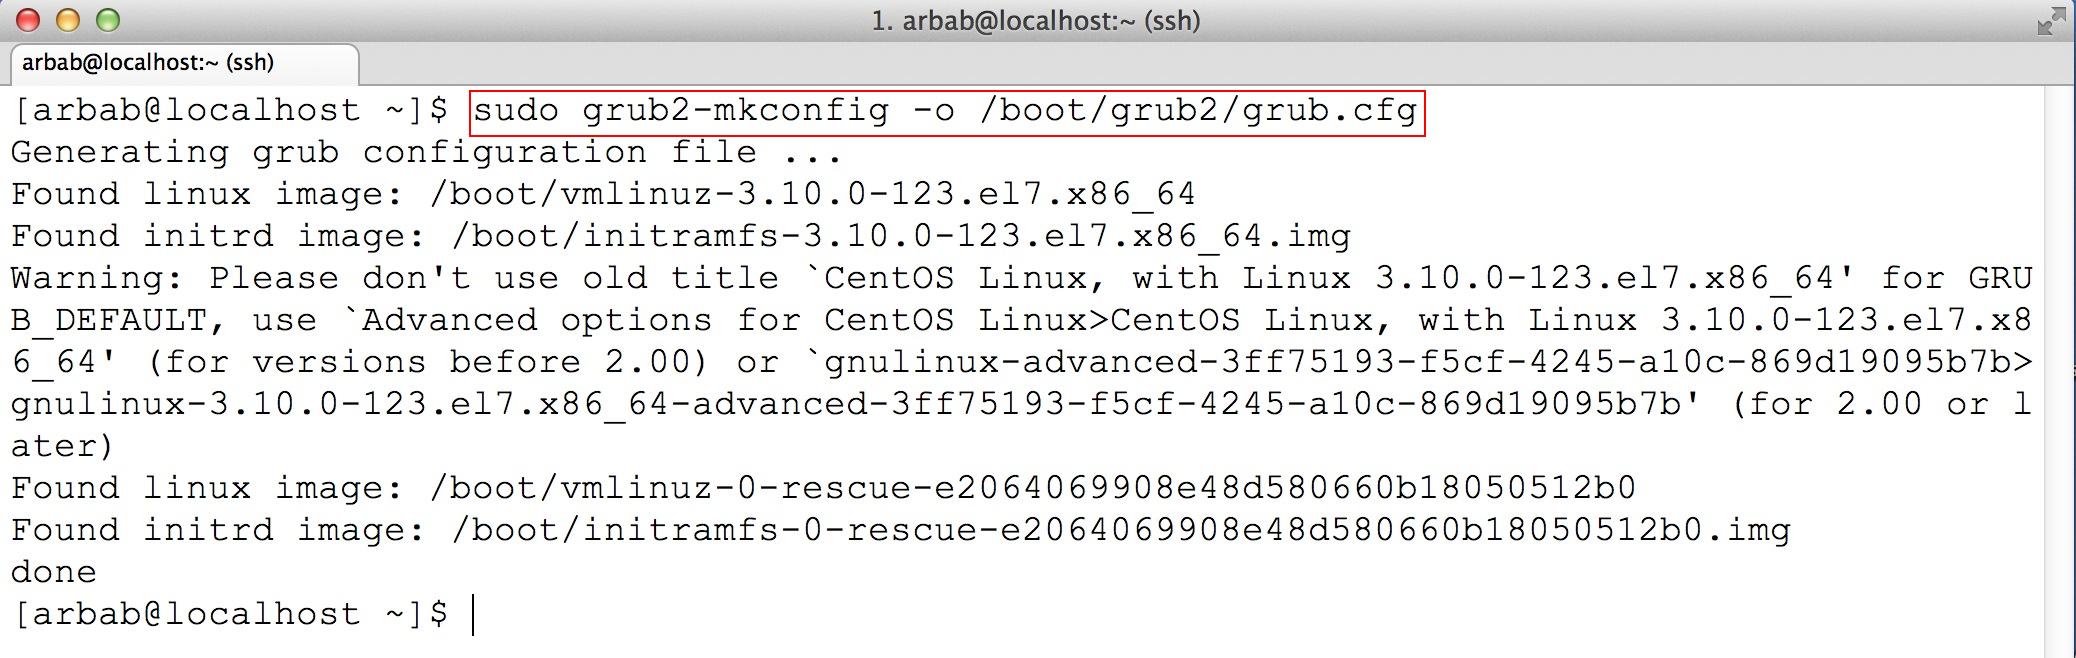
Create a new configuration based on the currently running system using grub2-mkconfig command:
sudo grub2-mkconfig -o /boot/grub2/grub.cfg
centos7 (9)
Rename the interface files by renaming the file “/etc/sysconfig/network-scripts/ifcfg-en01…
sudo mv /etc/sysconfig/network-scripts/ifcfg-eno16777736 /etc/sysconfig/network-scripts/ifcfg-eth0
centos7 (10)
Reboot the system:
centos7 (11)
After reboot, check the interface name:
centos7 (12)
4) Configure the static ip on the server:
Edit the interface file under /etc/sysconfig/network-scripts/ directory:
sudo vi /etc/sysconfig/network-scripts/ifcfg-eth0
centos7 (13)
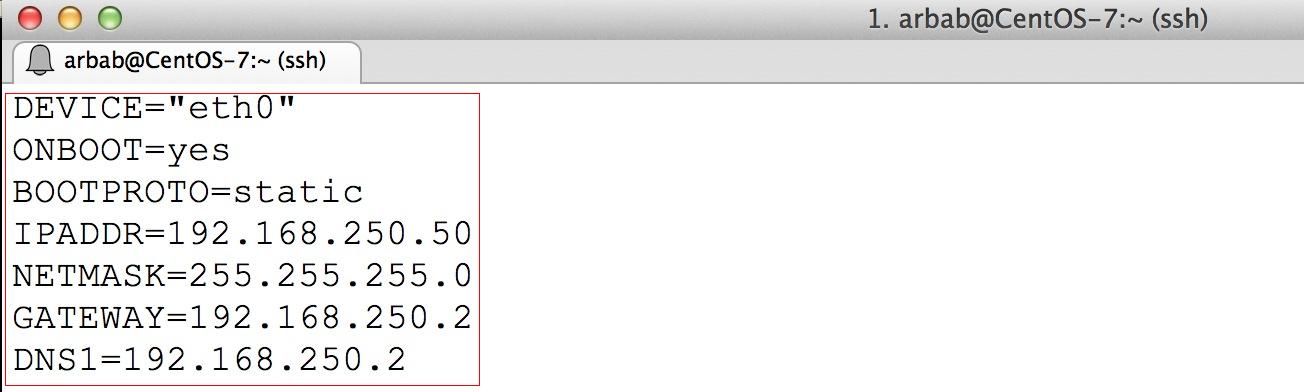
Here is my ifcfg-eth0 file as a sample, please change it according to your requirement:
DEVICE="eth0"
ONBOOT=yes
BOOTPROTO=static
IPADDR=192.168.250.50
NETMASK=255.255.255.0
GATEWAY=192.168.250.2
DNS1=192.168.250.2
centos7 (14)
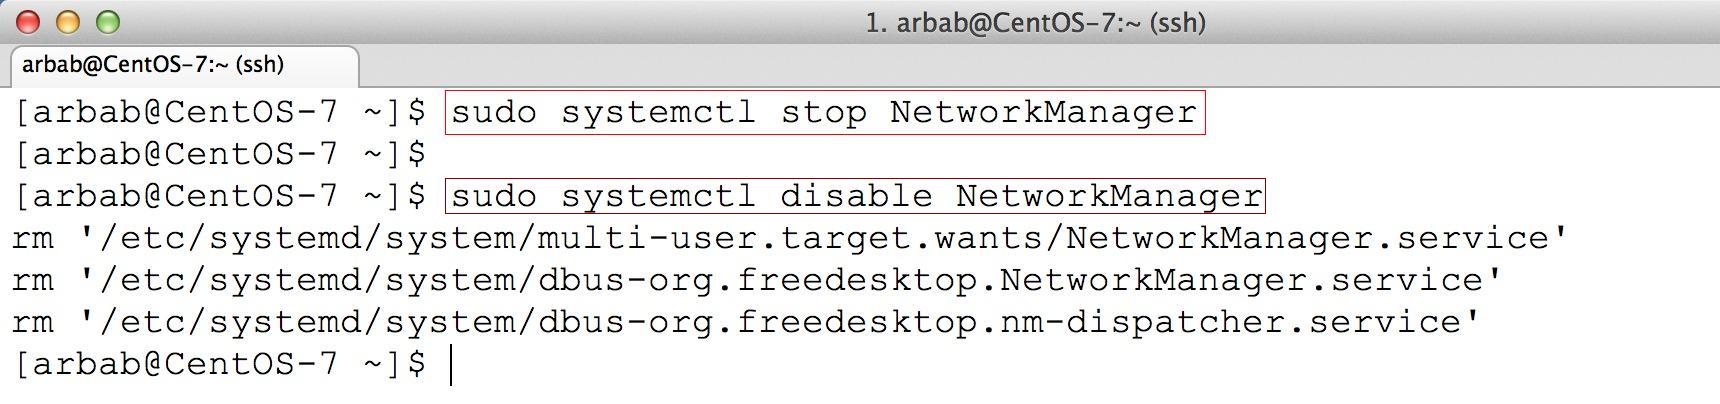
Stop and disable the NetworkManager service, because we don’t need it on the server:
sudo systemctl stop NetworkManager 
sudo systemctl disable NetworkManager
centos7 (15)
Restart the network service(Be careful, if you are connecting remotely, because you will be disconnected after issue this command):
sudo service network restart
centos7 (16)
Check the newly assigned static ip:
centos7 (17)
5) Disable IPv6:
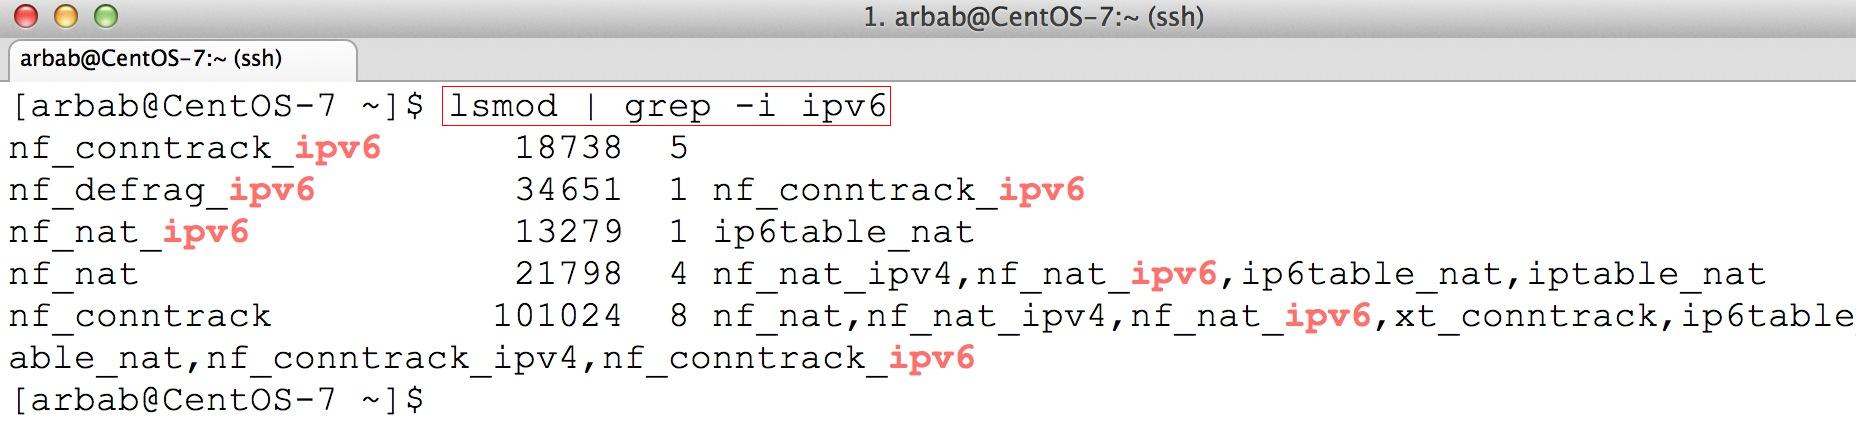
First check that IPv6 is enabled or not:
lsmod | grep -i ipv6
centos7 (18)
Edit the grub file:
sudo vi /etc/default/grub
centos7 (19)
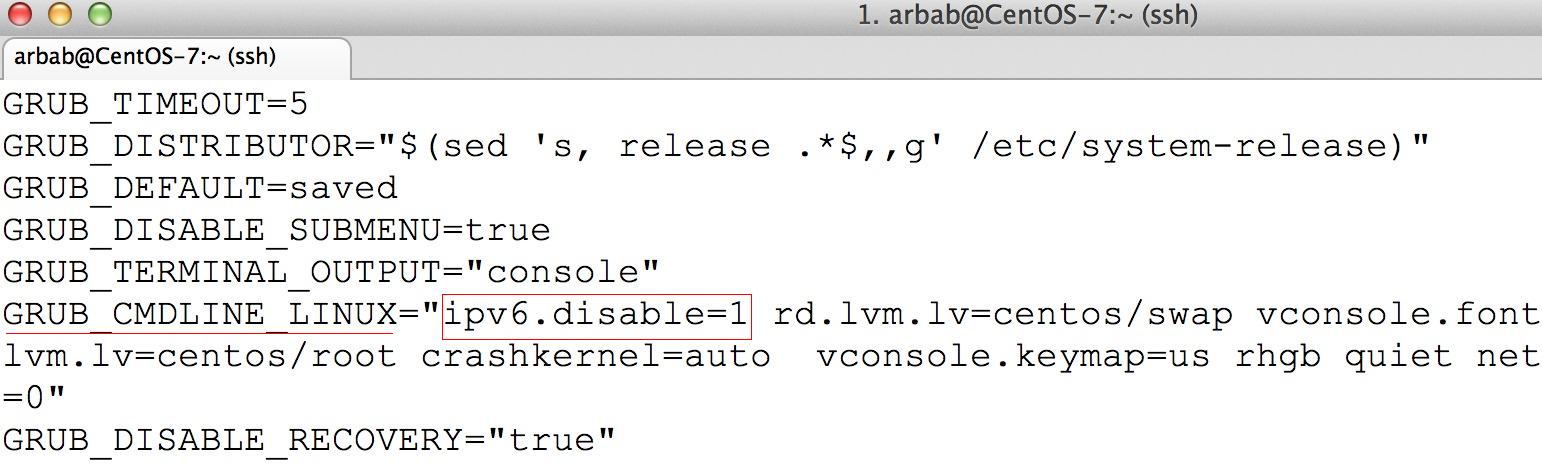
Search for the line “GRUB_CMDLINE_LINUX” and add the following at the beginning: “ipv6.disable=1
Will look like this:
GRUB_CMDLINE_LINUX="ipv6.disable=1 rd.lvm.lv=rootvg/usrlv...
centos7 (20)
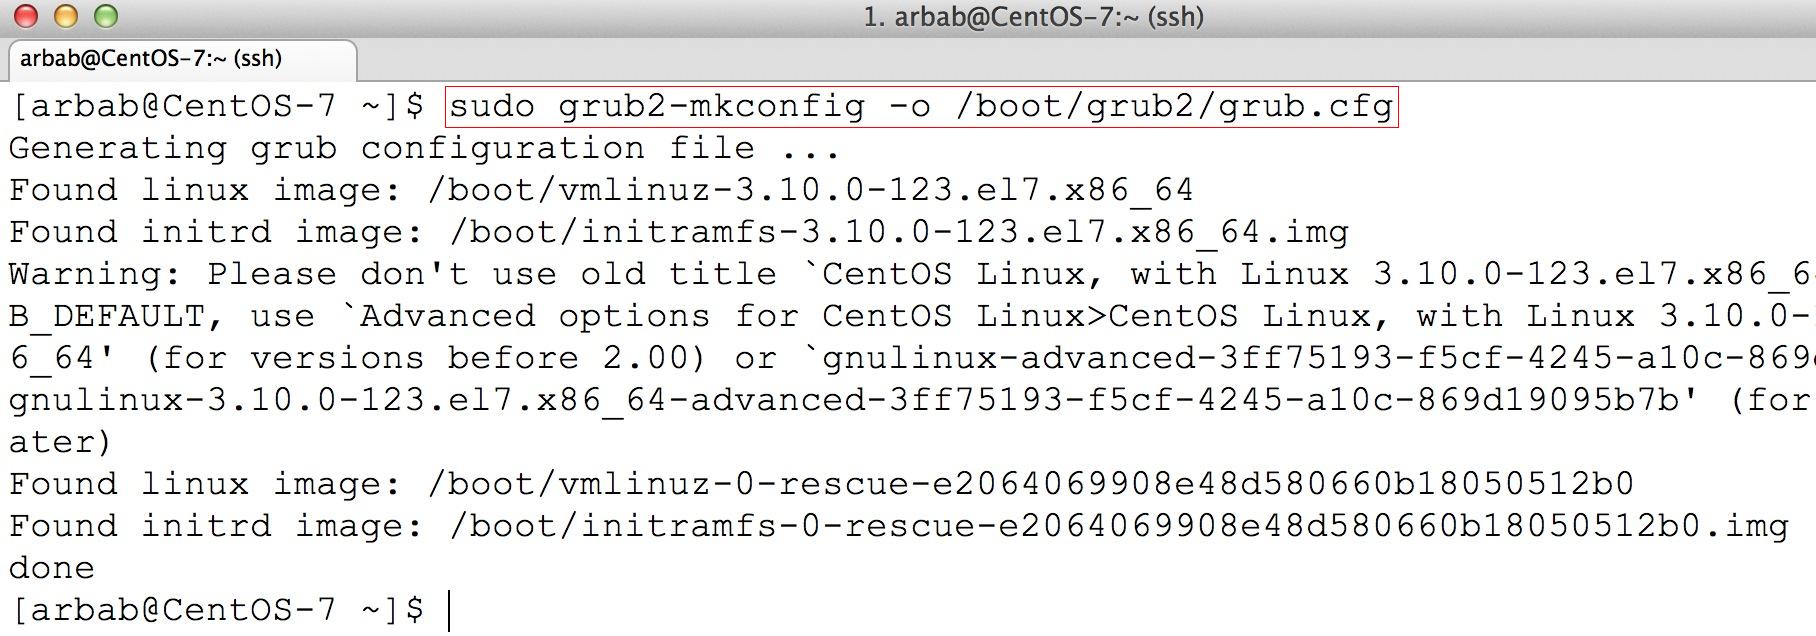
Create a new configuration based on the currently running system using grub2-mkconfig command:
sudo grub2-mkconfig -o /boot/grub2/grub.cfg
centos7 (21)
Reboot the system:
centos7 (22)
Once again, check the IPv6 on the system:
centos7 (23)
6) EPEL repository on Centos 7
To install the EPEL repository, issue the following command:
sudo rpm --import http://mirrors.nayatel.com/epel//RPM-GPG-KEY-EPEL-7
sudo rpm -Uvh http://mirrors.nayatel.com/epel/7/x86_64/e/epel-release-7-1.noarch.rpm
centos7 (24)
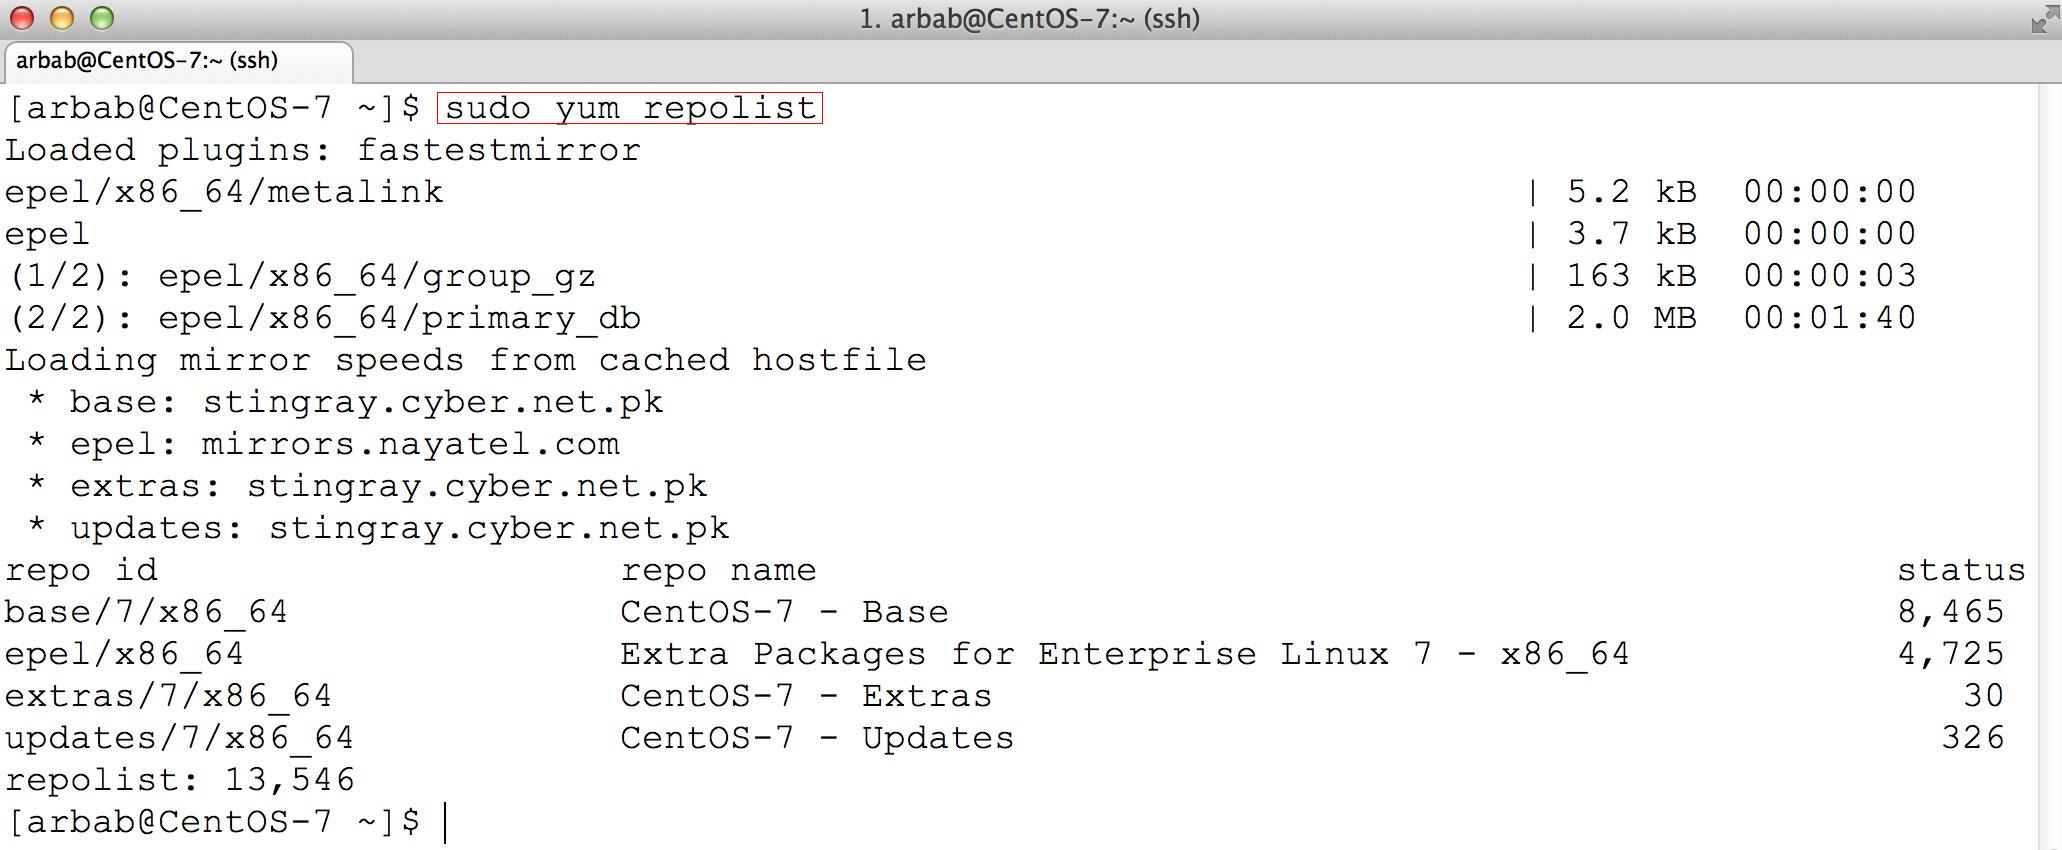
List your new repos:
sudo yum repolist
centos7 (25)
7) Enable iptables services(instead of firewalld):
When you will try to start/restart the iptables on newly install server, will get this error:
centos7 (26)
To fix this error, install the iptables-services package:
sudo yum install iptables-services
centos7 (27)
Re-run the command to restart the iptables:
sudo service iptables restart
centos7 (28)
Hope this will help you!
Please Remember me in your prayers!
Enjoy :-)

terça-feira, outubro 07, 2014

How to use Windows 8.1 RTM with 8.0 key? - Super User

How to use Windows 8.1 RTM with 8.0 key? - Super User

Is it possible to use the Windows 8.1 RTM Build from MSDN with an existing 8.0 Key?
It is indeed possible but you have to use the generic Windows 8.1 key below to install Windows 8.1 ( i.e. upgrade Windows 8.0 with the installation media ). The Windows 8.1 installer from the ISO does not accept Windows 8 keys. You need to install the system with a generic key and then enter your Windows 8 key after installing.
(see original post)
If you install the update through the Windows Store this isn't required. If you have Windows 8 Professional with Media Center you can also skip the step of having to basically downgrade to Windows 8 Professional then back to Windows 8.1 Professional With Media Center.
In order to do this I was force to use a generic license key which are stored on the Windows 8.1 installation media. Once the installation was done I was able to use slmgr.vbs to change my product key to a Windows 8.0 Upgrade license.[Screenshot TBA]
There have been mixed reports that using a non-generic Windows 8.1 license key in order to install Windows 8.1 will prevent you from using an Windows 8.0 Upgrade license key. Its not clear based on these reports if its possible to get around this state. These same reports indicate that changing a MSDN Windows 8.1 key to a Windows 8.0 MSDN key was possible.
I suggest waiting until the upgrade can be installed through Windows Store if this is a critical system. Its clear based on the number of steps required to do this that, using a Windows 8.1 installation media, is not the ideal way to upgrade to Windows 8.1.
I suspect this problem comes from the fact all Windows 8.1 license keys are "full" license keys and not upgrade license keys.