Centos 7 initial setup
Initial Settings after installing the CentOS 7
1) To change the hostname permanently, edit the following file:
sudo vi /etc/hostname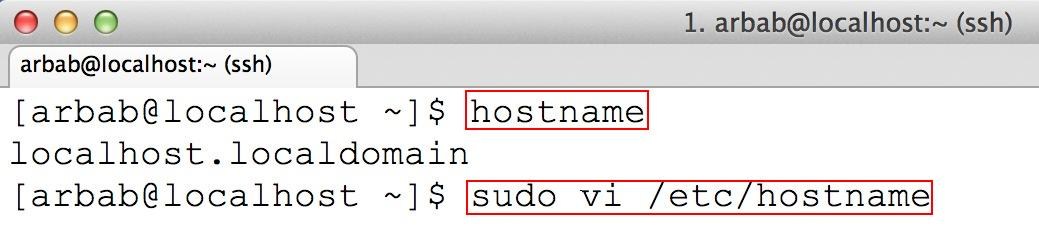
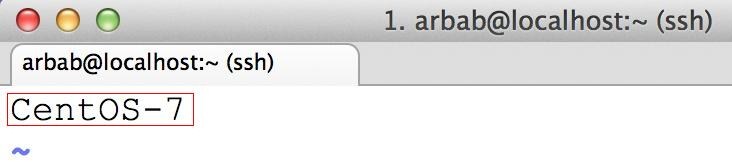
Here you can simply put the name of your system (in my case, I have assigned it CentOS-7):
After that, edit the hosts file:
sudo vi /etc/hosts
Here add the same name, that you have added in the /etc/hostname file, after 127.0.0.1:

After reboot, it will display the new hostname.
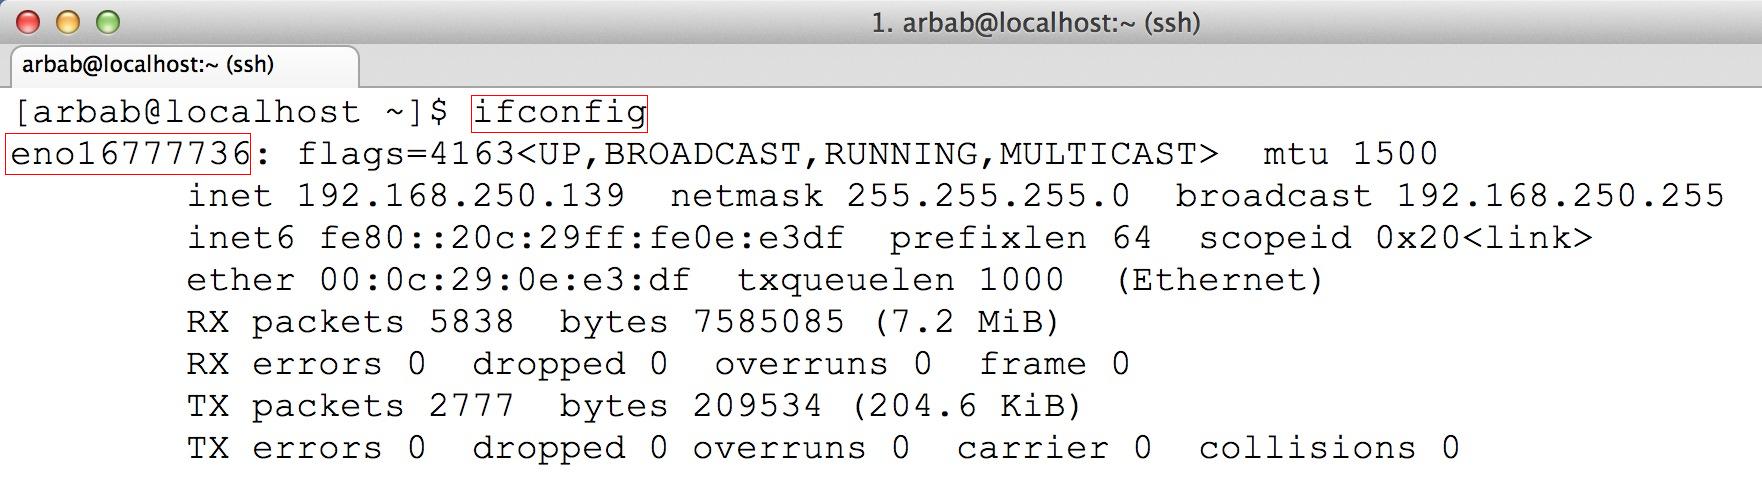
2) After login to the CentOS7 server(minimal installation), you will notice that the system doesn’t have ifconfig command :

Install the net-tools package which will include ifconfig:
sudo yum install net-tools
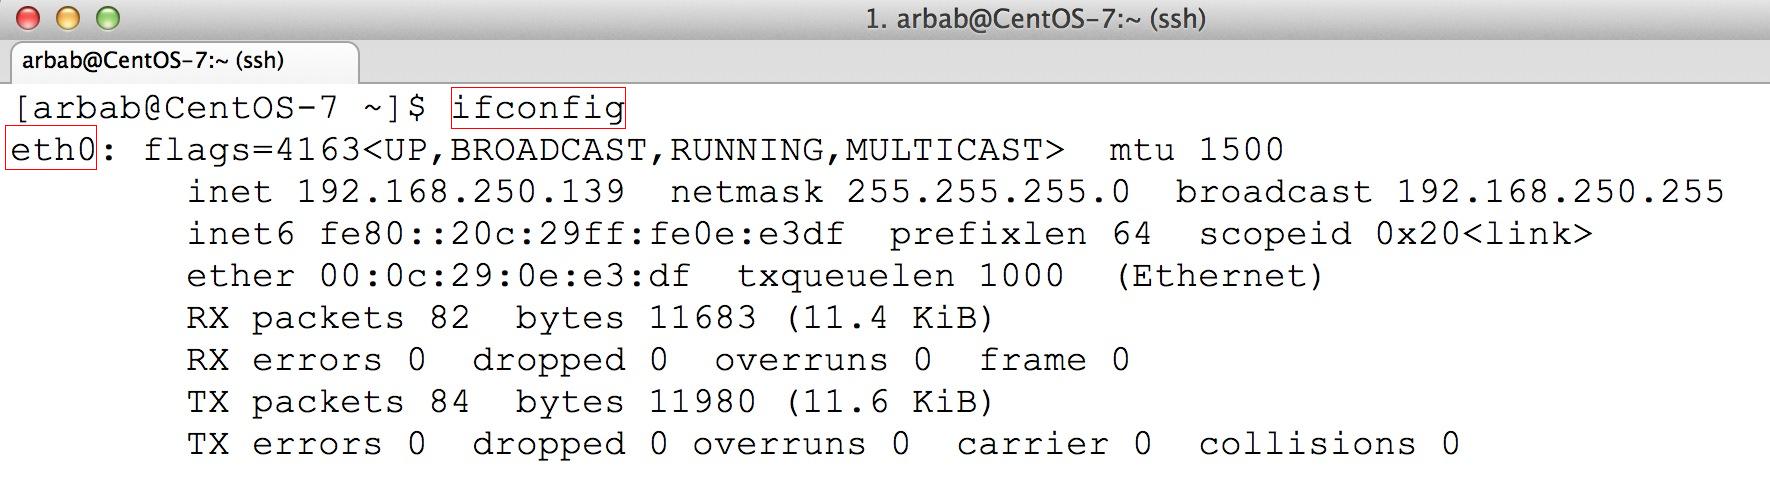
Try the ifconfig command once again:
3) Change the default network interface name to “eth0″
CentOS7 has a default nic name as “en016…..”, as we can see in above screenshoot. To change it back to the default network device name like “ethX”, edit the grub file:
sudo vi /etc/default/grub
Search for the line “GRUB_CMDLINE_LINUX” and append the following: “net.ifnames=0 biosdevname=0″
Will look like this:
GRUB_CMDLINE_LINUX="rd.lvm.lv=rootvg/usrlv rd.lvm.lv=rootvg/swaplv crashkernel=auto
vconsole.keymap=usrd.lvm.lv=rootvg/rootlv vconsole.font=latarcyrheb-sun16 rhgb
quiet net.ifnames=0 biosdevname=0"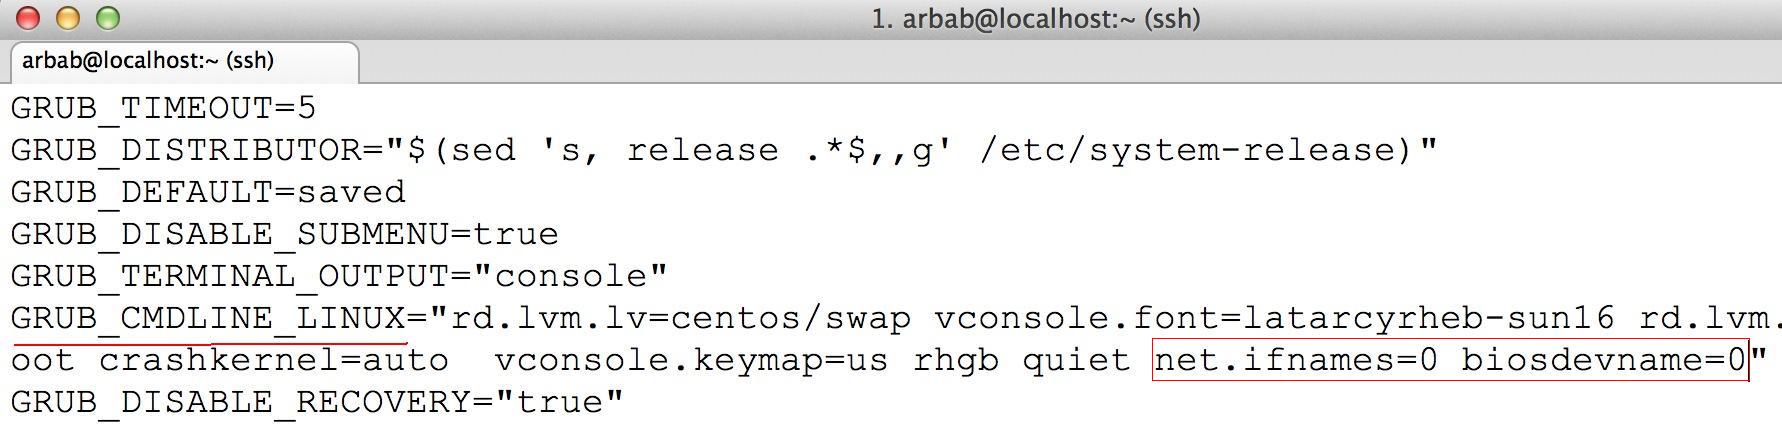
Create a new configuration based on the currently running system using grub2-mkconfig command:
sudo grub2-mkconfig -o /boot/grub2/grub.cfg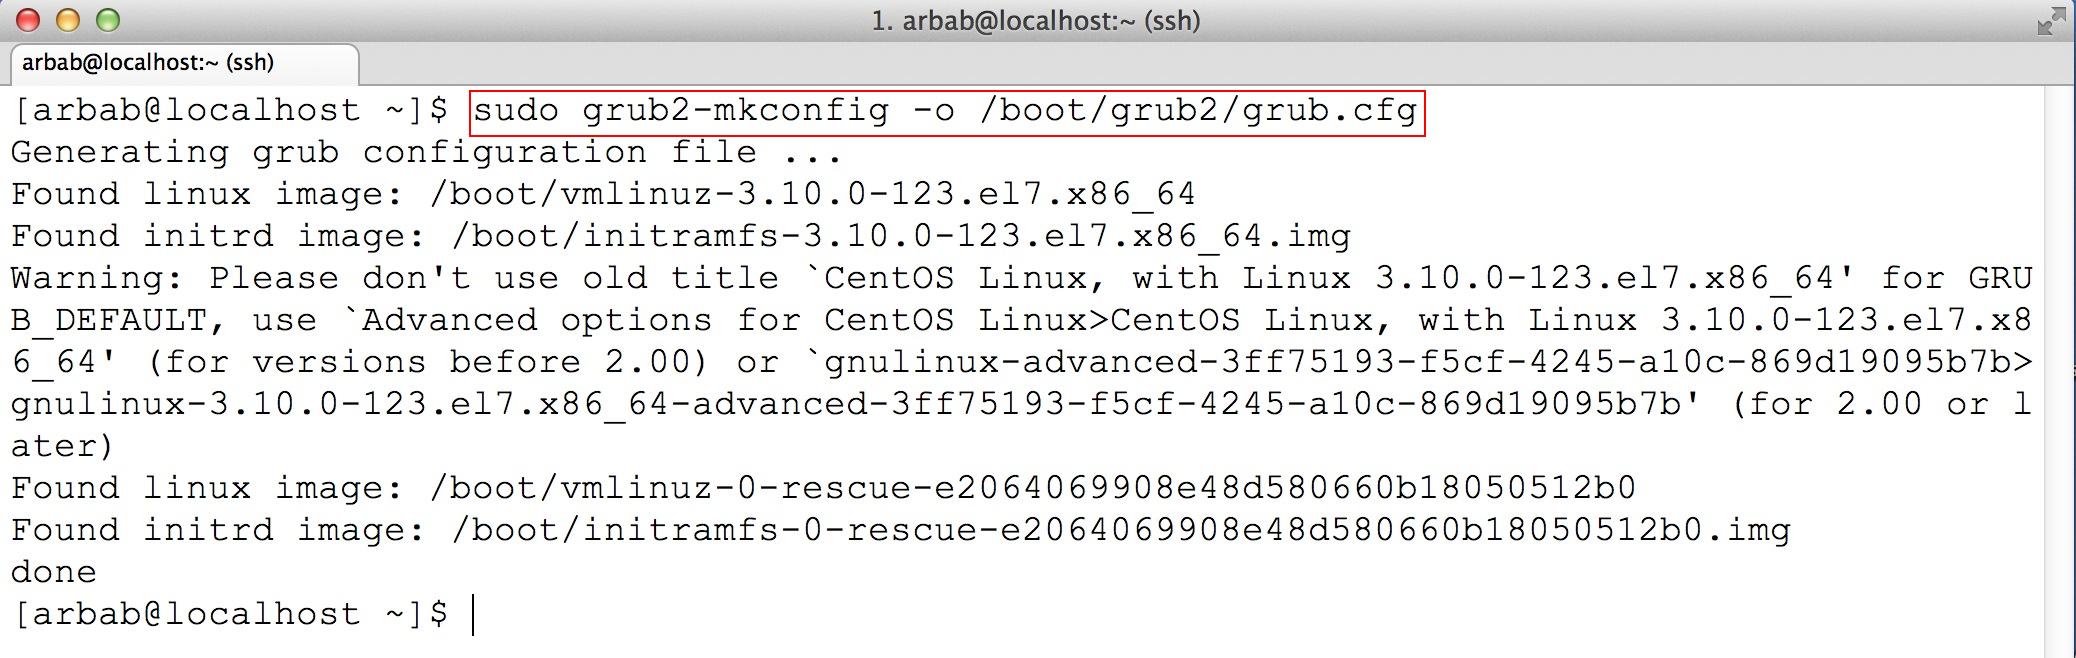
Rename the interface files by renaming the file “/etc/sysconfig/network-scripts/ifcfg-en01…“
sudo mv /etc/sysconfig/network-scripts/ifcfg-eno16777736 /etc/sysconfig/network-scripts/ifcfg-eth0
Reboot the system:

After reboot, check the interface name:
4) Configure the static ip on the server:
Edit the interface file under /etc/sysconfig/network-scripts/ directory:
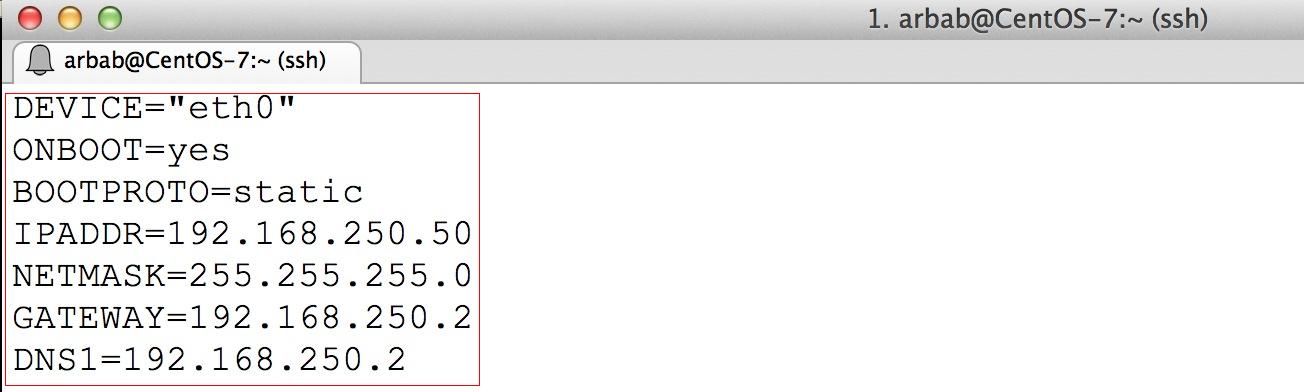
sudo vi /etc/sysconfig/network-scripts/ifcfg-eth0
Here is my ifcfg-eth0 file as a sample, please change it according to your requirement:
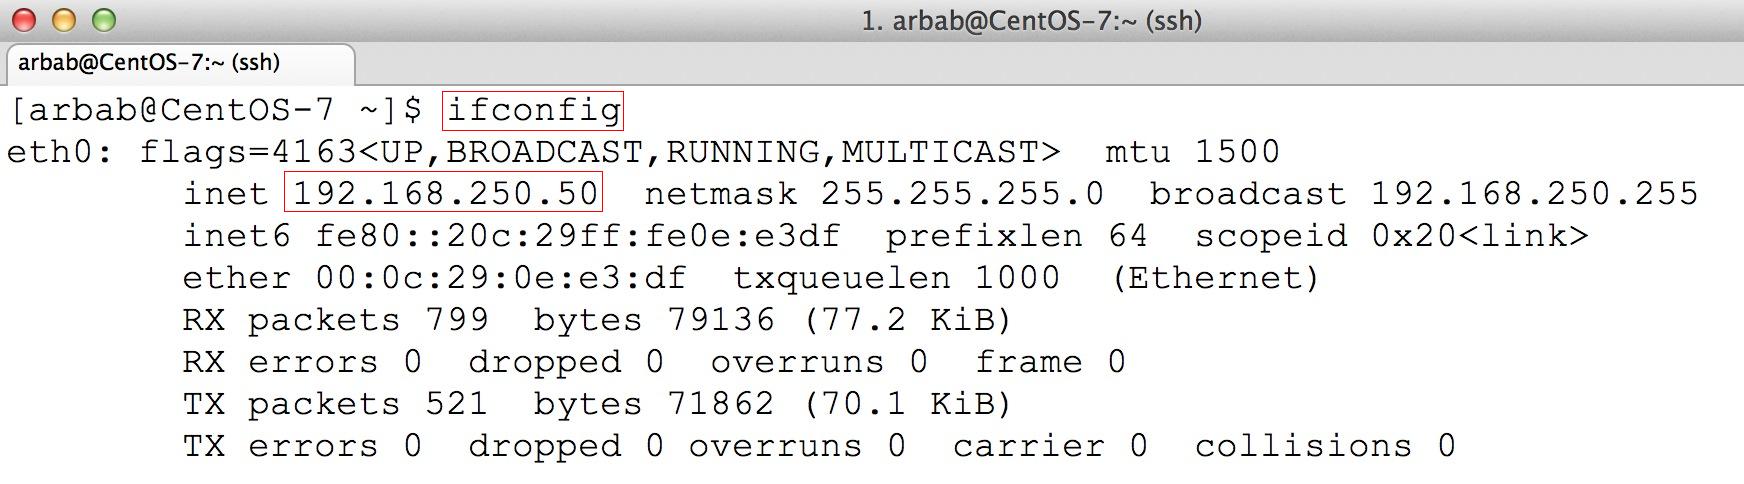
DEVICE="eth0"
ONBOOT=yes
BOOTPROTO=static
IPADDR=192.168.250.50
NETMASK=255.255.255.0
GATEWAY=192.168.250.2
DNS1=192.168.250.2
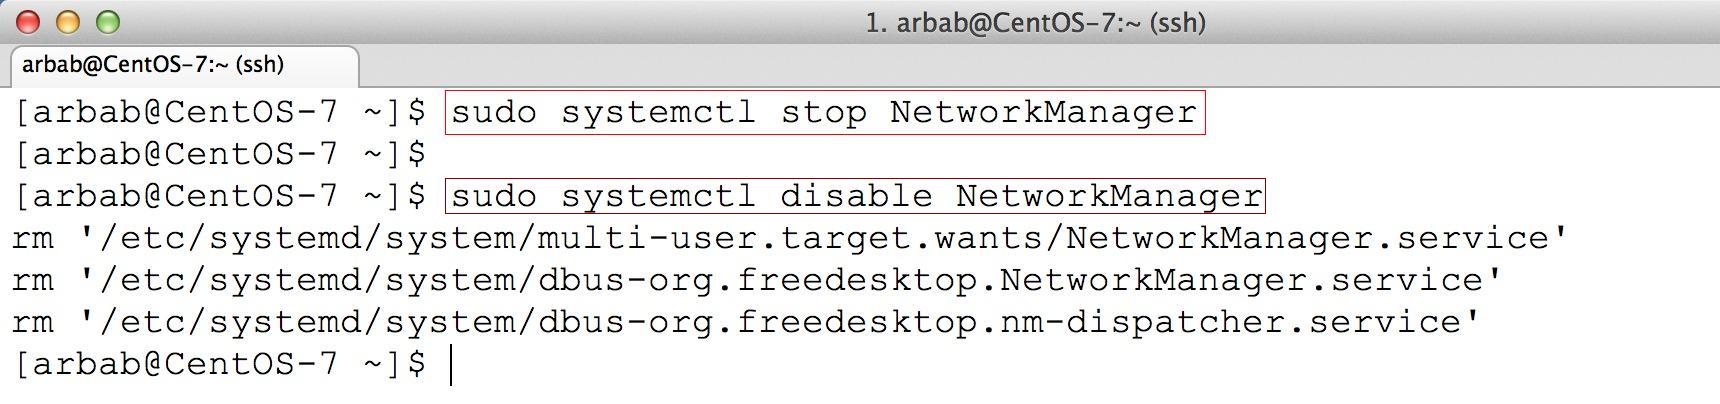
Stop and disable the NetworkManager service, because we don’t need it on the server:
sudo systemctl stop NetworkManager
sudo systemctl disable NetworkManager
Restart the network service(Be careful, if you are connecting remotely, because you will be disconnected after issue this command):
sudo service network restart
Check the newly assigned static ip:
5) Disable IPv6:
First check that IPv6 is enabled or not:
lsmod | grep -i ipv6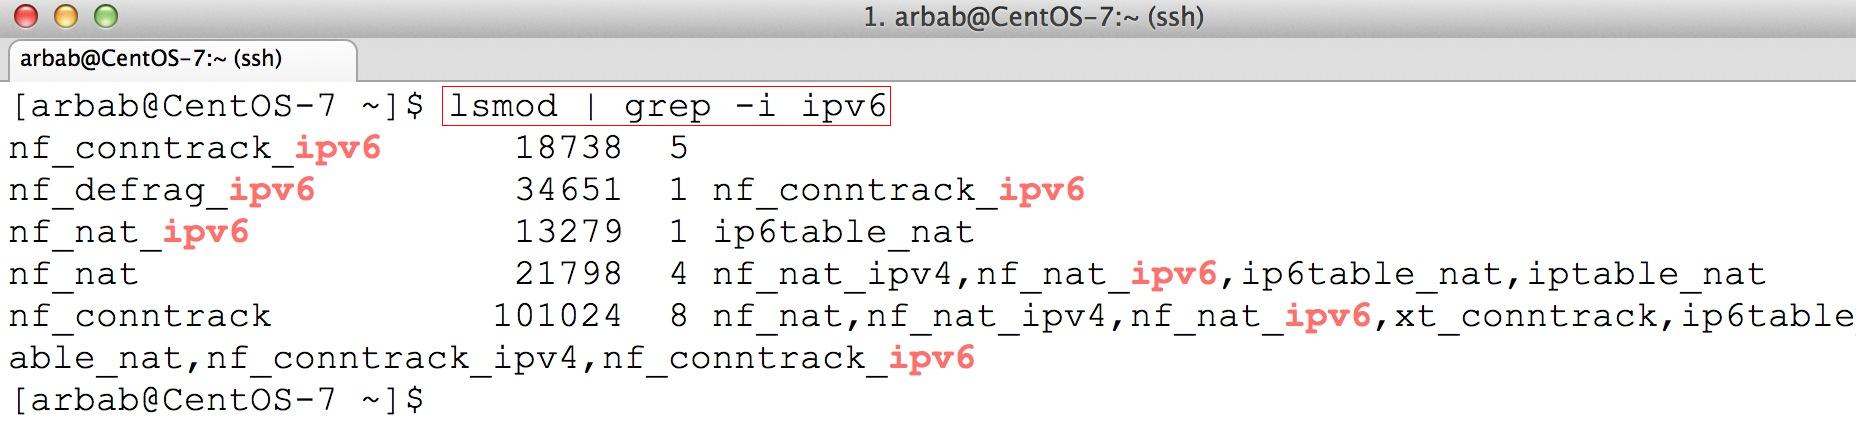
Edit the grub file:
sudo vi /etc/default/grub
Search for the line “GRUB_CMDLINE_LINUX” and add the following at the beginning: “ipv6.disable=1″
Will look like this:
GRUB_CMDLINE_LINUX="ipv6.disable=1 rd.lvm.lv=rootvg/usrlv...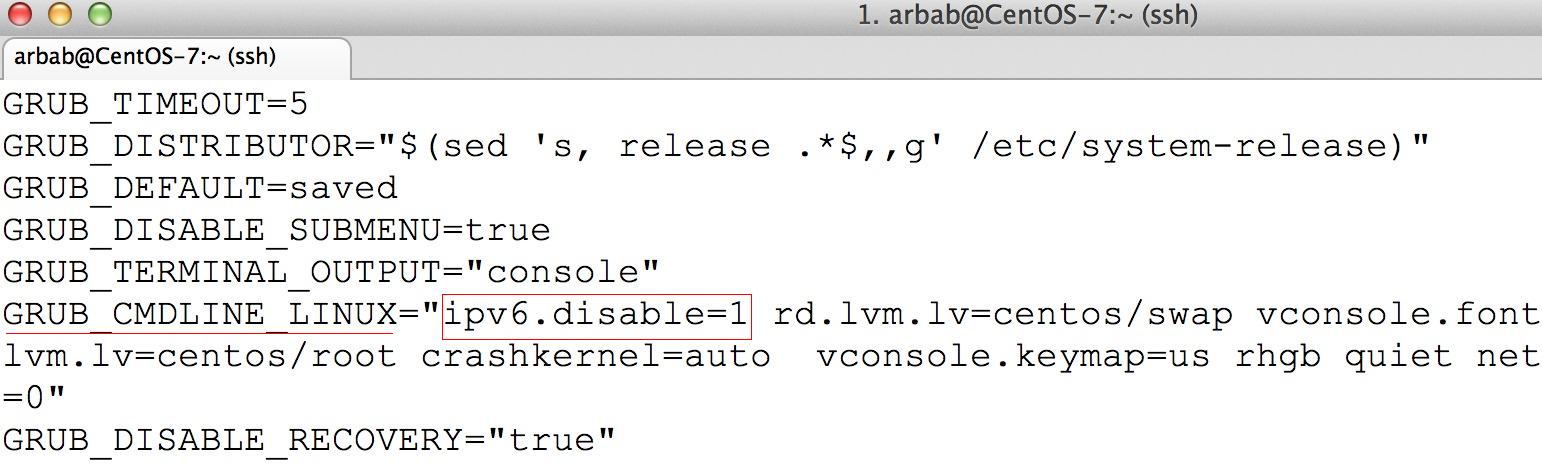
Create a new configuration based on the currently running system using grub2-mkconfig command:
sudo grub2-mkconfig -o /boot/grub2/grub.cfg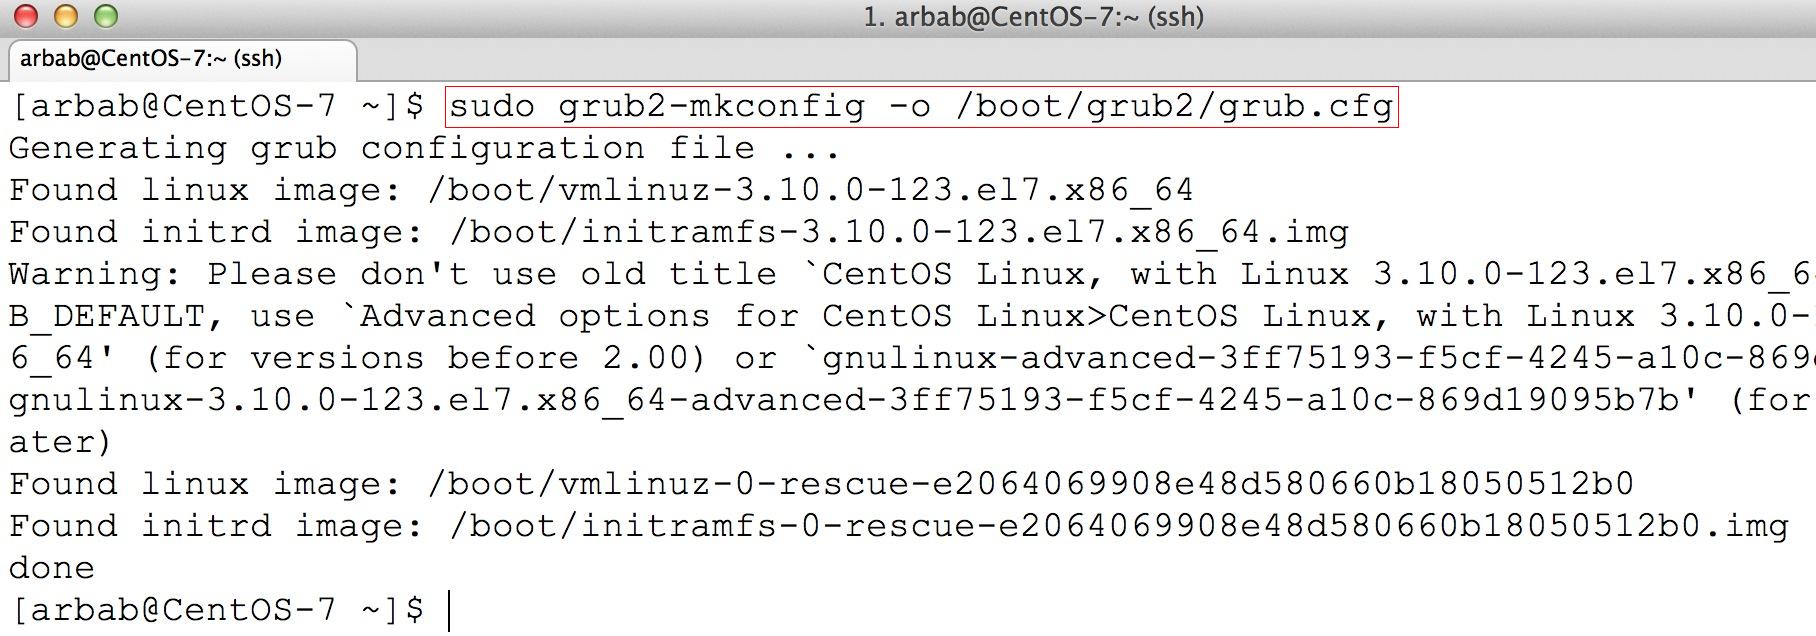
Reboot the system:

Once again, check the IPv6 on the system:

6) EPEL repository on Centos 7
To install the EPEL repository, issue the following command:
sudo rpm --import http://mirrors.nayatel.com/epel//RPM-GPG-KEY-EPEL-7
sudo rpm -Uvh http://mirrors.nayatel.com/epel/7/x86_64/e/epel-release-7-1.noarch.rpm

List your new repos:
sudo yum repolist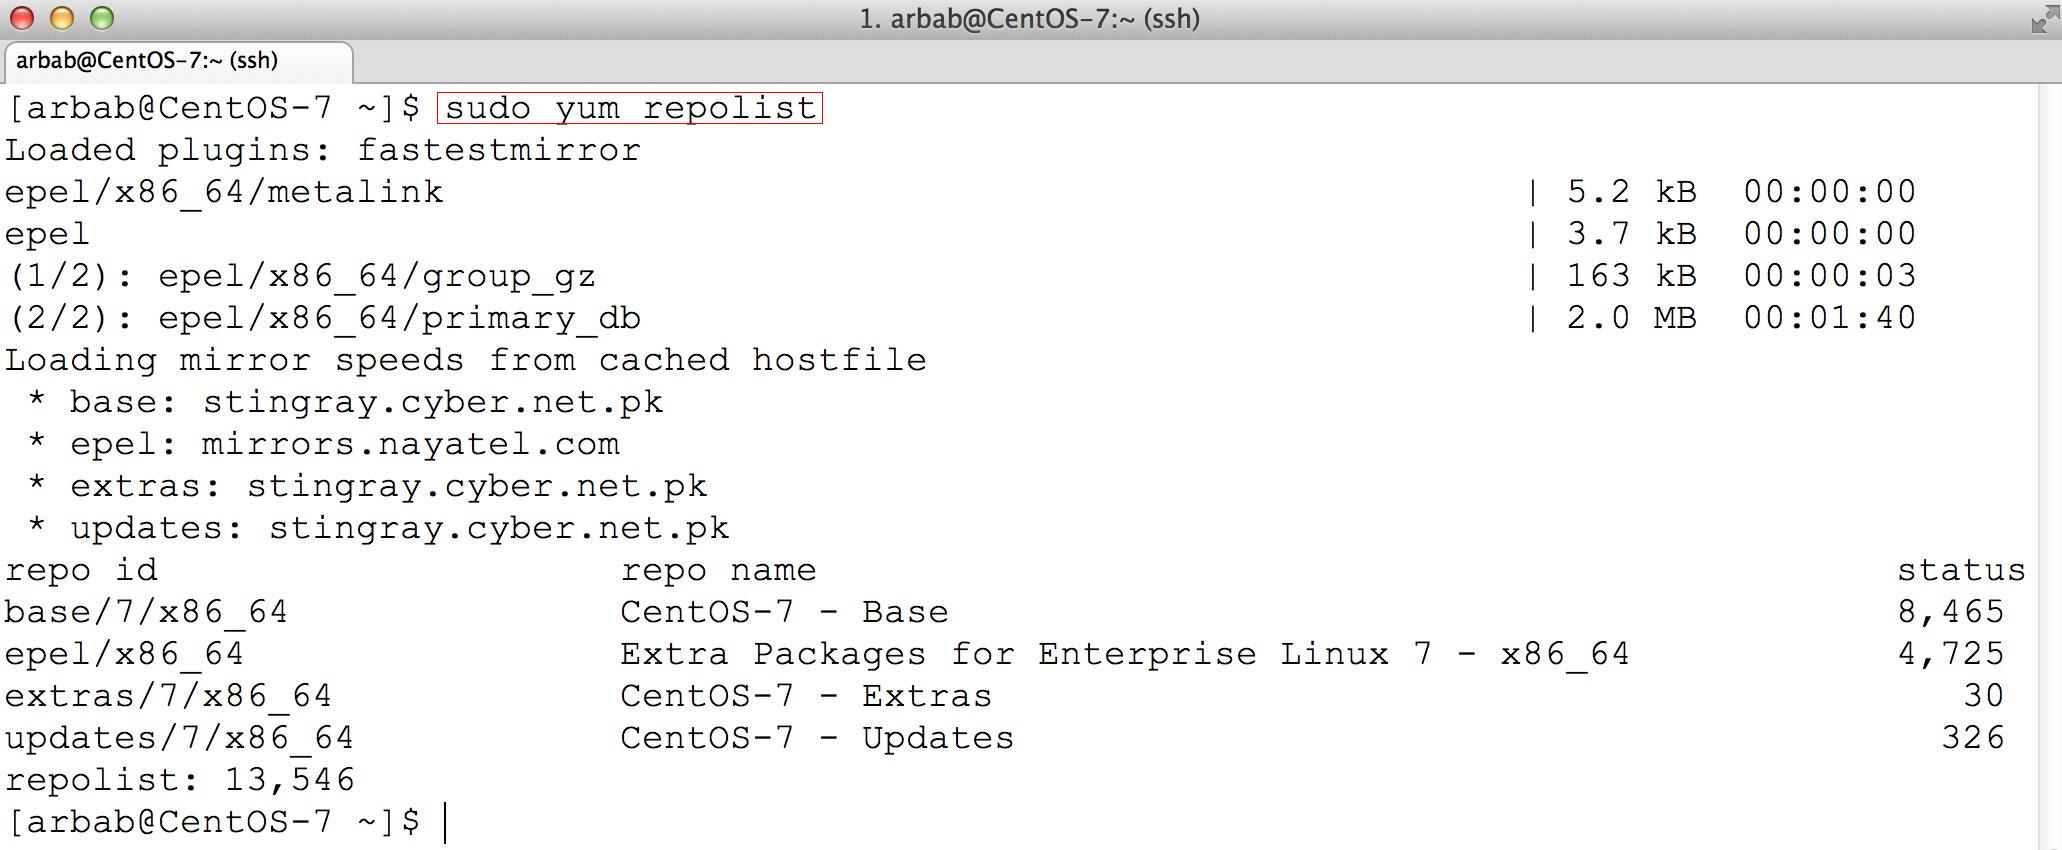
7) Enable iptables services(instead of firewalld):
When you will try to start/restart the iptables on newly install server, will get this error:

To fix this error, install the iptables-services package:
sudo yum install iptables-services
Re-run the command to restart the iptables:
sudo service iptables restart
Hope this will help you!
Please Remember me in your prayers!
Enjoy 
Nenhum comentário:
Postar um comentário